by Kelly Garcia
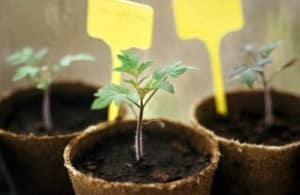
Home stores have discovered the secret for making more money from their gardening customers. The seeds alone can only earn so much money. Many growers these days choose to harvest their own. So every spring, big home stores start pushing all the little extras for their customers to grab on impulse as they leave the garden area. One of their favorite gimmicks is cutesy peat pots for starting seeds.
Some theme boxes come ready for salsa-growing or strawberry-sprouting, the boxes covered with sombrero-wearing peppers or dancing berries. It seems like such a great buy too. They are bulk packaged. They’re used to grow your own food. It all can seem deceptively cost-effective. That is, until you look at how many you need and how much the packages cost. You’re paying dearly for those cheerleading cherries on the package.
Many people just use empty toilet paper or paper towel rolls. Others find cardboard egg cartons or flats very useful. For one thing, the cartons come free with every purchase. The cardboard is biodegradable so the flats can be cut apart once the individual sprouts need to be transplanted. Each homemade pot can be buried directly in the ground.
If egg cartons or paper rolls aren’t an option, there’s always the newspaper method. You’ll need wide strips of black and white newspaper and an empty jar or glass. Wrap the newspaper strips around the jar then fold the ends over and fix the bottom. Some people use masking tape. Others prefer to crush the paper together and leave it there for a time until the shape holds.
There’s also the paper mulch method that also produces biodegradable starter pods that can go right into the ground once sprouting is underway. This is a fun project to involve the kids in. Gather up all your junk mail over the winter and then rip it to shreds. You’ll also need an old blender and a muffin tin. Once all the paper is shredded, put it into the blender. Add to it a small amount of warm water and blend on high.
The blending will be gradual, adding warm water as needed. Drain off any excess water from the mulch. The resulting pulp will look like papier-mâché, since that’s what it is. Fill each muffin tin with mulch. Force the mixture down to conform to the bottom of each tin, pushing it up the sides. Absorb any excess water with a paper towel.
Sit the muffin tin in a dry and bright place, like a sunny window ledge or patio. It will take a couple of days for the pots to set and be ready for spring planting.
Have a fertile and thrifty growing season!
Image Credit
free free free.
thank you for a great idea